آموزش مدلسازی تری دی مکس 3ds Max Modeling Creating compound objects with new Booleans
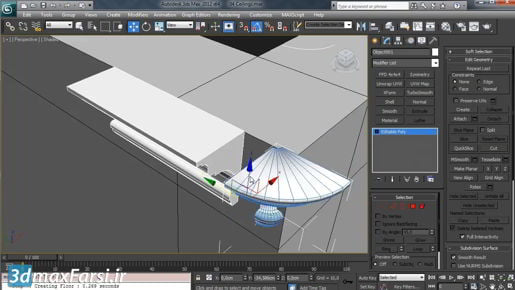
دانلود رایگان ویدئو آموزشی آموزش مدلسازی تری دی مکس 3ds Max Modeling Creating compound objects with new Booleans در فصل مدل سازی انیمیشن اولین موضوع ما ابزار جدید بولی خواهد بود. اگر با Booleans آشنا نیستید ، روشی برای ترکیب اشیاء سه بعدی است. به عنوان مثال می توانید از یک شی برای بریدن سوراخ در دیگری استفاده کنید ، یا می توانید دو شیء را به هم وصل کنید و هندسه داخلی را برداشته و یک شیء ضد آب یا یکپارچه ایجاد کنید. اگر قبلاً از Booleans استفاده کرده اید احتمالاً می دانید که آنها کمی مشکل هستند. اگر در مورد توپولوژی خود مشکلی دارید ، نتیجه آن می تواند در نتیجه عملکرد Boolean به شکست انجامید. شما باید اطمینان حاصل کنید که از جزئیات کافی در اشیاء خود برای انجام عملیات برخوردار هستید. هنوز لازم است اشیاء خود را به این روش با Boolean جدید آماده کنید. الگوریتم تحت هود واقعاً بهبود نیافته است ، اما رابط کاربری بهبود یافته است و توانایی های جدیدی داریم که با Booleans قدیمی نتوانستیم انجام دهیم. برای ایجاد یک شیء بولی ، یکی از اشیاء موجود در صحنه خود را انتخاب کنید ، و این اولین اجرا خواهد بود. این کمی از عملگر ویژه است. معمولاً بزرگترین شی را انتخاب می کنید. و سپس وارد پنل ایجاد شوید و در دسته ها اشیاء مرکب را انتخاب کنید ، و اگر یک شی معتبر انتخاب شد می توانید بر روی Boolean کلیک کنید ، و آن ایجاد شد. شما می توانید مستقیماً به پنل ایجاد بروید و شروع به اضافه کردن اپرندهای بیشتر کنید ، اما توصیه می کنم سریعاً روی پنل اصلاح پرش کنید. من می خواهم پنل فرمان را در اینجا گسترش دهم. ما را کمی بیشتر روی صفحه نمایش قرار دهید. و برای اضافه کردن عملوندها فقط روی دکمه add operands کلیک کنید و بیایید این چهار استوانه برش آبی را در اینجا اضافه کنیم. فقط روی هر یک از افراد پیاپی کلیک کنید. پس از افزودن آنها ، می توان نوع عملکرد آنها را در اینجا تغییر داد. پیش فرض اتحاد است ، که اشیاء را با هم ترکیب کرده و هر هندسه داخلی را حذف می کند ، یک ضد آب یا مشبک را ایجاد می کند. ما همچنین می توانیم تفریق کنیم. روی تفریق کلیک کنید و ما فقط یک مورد را تفریق کرده ایم ، اما می توانیم این موارد را نیز انتخاب کنیم. کلید Shift را نگه دارید و انتخاب کنید و سپس بر روی تفریق کلیک کنید. و خوب ، خیلی جالب بیایید از کلید Shift برای انتخاب همه این اجسام استوانه برش استفاده کنیم و برخی از این گزینه های دیگر را از اینجا امتحان کنید. ادغام تمام قسمتها را به هم می زند و لبه های جدیدی را در اتصالات ایجاد می کند ، اما هیچ یک از قسمت های داخلی را پاک نمی کند. و اگر بین اتحادیه و ادغام قرار بگیرم می توانید تفاوت را مشاهده کنید. این امر به ویژه در نمای برتر آنچه اتفاق می افتد مشهود است. خوب ، بنابراین ادغام فقط ایجاد لبه های جدید است.
- آموزش تری دی مکس 3ds max Hierarchies Linking objects
- آموزش تری دی مکس 3ds max Hierarchies Prioritizing rotation axes
- آموزش تری دی مکس Understanding 3ds max Hierarchies
- آموزش تری دی مکس 3ds max Hierarchies Transforming pivot points
- آموزش تری دی مکس Mapping Textures 3ds max Restoring links with Asset Tracking
Then we have the attach operation. And that's the same as the attach command in editable poly. It simply combines the parts and doesn't change any of their topology, so no new edges are created anywhere. Insert is a little bit special. And what it does is it cuts holes, but it also leaves the current operand visible, it doesn't delete the faces. So what it's doing in this case is it's subtracting from the main cylinder or disc here, but not erasing these other pieces. And we really can't see that well right now, what's going on. Let me make a duplicate of that object, so we can analyze it. I'll grab the move tool, and then hold down the Shift key to make a duplicate, and it's gonna be a copy, and then convert it to editable poly. Right-click, and convert to, convert to editable poly. Once that's done we can actually select by element. And this will hopefully illustrate what the insert function does. It's actually a very cool function. Again, what insert does is it keeps the current operand, but subtracts from the other operands. So we can make parts that fit into each other. Alright, cool, so I'm gonna delete that duplicate now that I've shown you what insert does. Back on our Boolean object, just a couple other things. What is imprint? It simply slices new edges where the current operand intersects and it deletes the faces of the current operand. And it's really only relevant for certain types of operations. If we have union or subtract or intersect or merge selected and we choose imprint it's gonna do the same thing in all those cases. It's just drawing new edges here where the two surfaces met. Imprint has no effect on the attach type. If you use insert and imprint together then it's going to slice new edges, but it does not delete the current operand's faces. It's a little bit hard to illustrate here.
I could, once again, make a duplicate, hold down Shift and drag, make a copy. And then right-click and convert that copy to editable poly. Then in element mode we can select one of these and move it. And as I said, what it does is it creates new edges, but it doesn't delete the original operand. Those are the different operation types, except we didn't look at one, which is intersect. I'll turn imprint back off again. And with those four cylinders selected choose intersect. And we see a curious result, which is apparently everything has disappeared. What's happening here is that we're trying to find the overlapping volume, but none of these objects actually overlap with one another. To make it clear how intersect works I'm gonna set three of these to a union and just this one to intersect, so we can see what it's doing. It's finding the overlapping volume between itself and everything else. But if we have all of these set to intersect then if they don't overlap or touch one another then we won't see any result on the screen. Just to illustrate, I can make another one of these cylinders an intersection and then move it, and there are a couple different ways to move it around. Really the easiest way is to double-click here. What that does is puts you into a sub-object mode here, and it also selects that sub-object. And since I've got the move tool selected my move gizmo is positioned there. Here in the display section I can turn on display operands or display selected operands. This is gonna be the easiest way for me to illustrate my point here.