آموزش انیمیشن تری دی مکس 3ds max Keyframe Animation Editing function curves in the Curve Editor
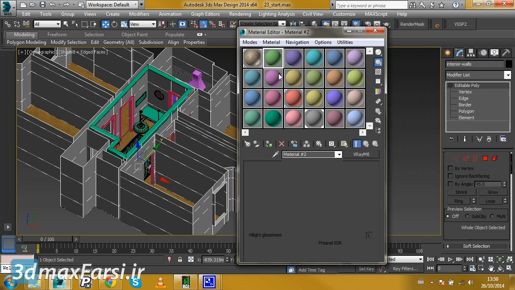
برای بیشترین و بهترین کنترل در مورد داده های انیمیشن ، از ویرایشگر Curve برای تنظیم درون یابی بین فریم های کلیدی استفاده می کنید و این پر کردن داده های ناشناخته است. برای ایجاد کلید در انیمیشن رایانه ، ما فقط داده های موقعیت و چرخش را بر روی نقاط خاص به موقع تنظیم می کنیم و سپس کامپیوتر تمام داده های بین را پر می کند. و ما کنترل می کنیم که چگونه بین و یا درون یابی با استفاده از ویرایشگر Curve اتفاق می افتد. شی دوربین را که متحرک است انتخاب می کنم. من می توانم Curve Editor را از منوی Graph Editor ، Track View Curve Editor یا از یک دکمه در نوار ابزار اصلی در اینجا ، Curve Editor باز کنم ، بنابراین بر روی آن کلیک می کنم. و ما به طور پیش فرض آهنگ های متحرک شیء انتخاب شده را می بینیم و می توانیم به روش های معمول از این اندازه تغییر اندازه دهیم. Ctrl ، Alt و موس متوسط را برای بزرگنمایی یا بیرون یا بالا یا پایین بکشید. بنابراین ماوس Ctrl-Alt وسط همه به یکباره اجازه می دهد تا داخل و خارج بزرگنمایی کنیم و سپس ماوس میانی به خودی خود اجازه می دهد تا تابه کنیم. ما همچنین می توانیم از چرخ ماوس استفاده کنیم تا dolly عقب یا بزرگنمایی کنیم و فقط این را قاب کنیم.
So we've got key frame data on X position, Y position, Z position. And then for rotations, again, our rotations are notated a little bit strangely here because we're using a different axis order. But we can actually investigate this and make this a little easier to understand by deleting the non-animated tracks or curves because not all of these curves are actually important to the animation. If I go into rotation, I can select one of these individually. Z rotation. It's flat. That means there's no change in the value of that key frame or that rotation value. Time is running horizontally here. We've got a timeline. And the value of the key frame is running vertically. If there's no change and it's perfectly flat, that means there's actually no key frame animation there. So I can clean this up and just make it easier on myself by deleting these key frames. The default tool on the Curve Editor toolbar is the Move Keys tool. And I'll just draw a rectangle around those two key frames and press the Delete key on the keyboard. And now, it's a dashed line, indicating that there is no key frame data in the current time range. Then go over to the track view and click on the next rotation channel, which is labeled X Rotation, and it too is flat. There's no change in that rotation, in that axis over time. So again, I'll select those key frames and press Delete. Then go over to Z rotation and this is the one that's actually animated. And because I moved its key frame in the previous movie, it's starting its rotation on frame 40. If I want to work just on this key frame, I can frame the Curve Editor so that it just automatically encloses the time segment and the current values. And that's what this button is down here, Frame Horizontal and Value Extents. And now, it's taking up the entire window. We have a default interpolation here. This is an S curve using so-called auto-bezier curves. We're getting a slow-out of this key frame and then the slope indicates the rate of change, so we're rotating more quickly now, and then it levels off at the top, doing a slow-in to frame 149. So that's a traditional default auto-bezier S curve. Now, we're getting that on all of the transform channels. We can go over to the position tracks and investigate. Click on X Position and then hold down Ctrl and click on Y and Z, then go back down here and click Frame Horizontal and Value Extents. And it looks like we're not moving in Z and that's the world Z axis, so there's no change in elevation. If I want, I can select those and delete them. But we are moving in both the X and Y axis of the world. And once again, we're getting that default interpolation, which is auto-bezier. Now, let's just take a look at what this will do if we change these. So I'm also going to select the rotation as well. So let's select the Y position track and then hold down Ctrl and click on the X position, and Ctrl-click on Z rotation,
- آموزش انیمیشن تری دی مکس 3ds max Keyframe Animation Creating keyframes in Auto Key mode
- آموزش تری دی مکس 3ds max Keyframe Animation Setting up Time Configuration
- آموزش تری دی مکس 3ds max Hierarchies Locking transforms
- آموزش تری دی مکس 3ds max Hierarchies Avoiding and correcting scale issues
- آموزش تری دی مکس 3ds max Hierarchies Linking objects